fbpx

Update Your Nightscout Site to the Latest Version

Updating your website to the newest version (currently 13.0, nicknamed Ketchup) is easy with the update tool linked below.

Requirements

This version of Nightscout will probably not run on anything older than these versions/platforms:

  • Android 4
  • iOS 9
  • Chrome 68
  • Edge 17
  • Firefox 61
  • Safari 10 (macOS 10.12)
  • Opera 54
  • Internet Explorer: none

Azure Users

As of 0.12, Nightscout no longer readily supports the free Azure platform. If you really want to keep using Azure, don’t update to this version.

Directions

  1. Log in at GitHub.
    WAIT: Make sure you’re actually signed into your GitHub account — look in the upper right corner of the page to verify. You cannot do this step later. Do it right away.                                                                                                                                                                                   
  2. Click here to open the update tool in a new tab.                                                                                                                                                                     
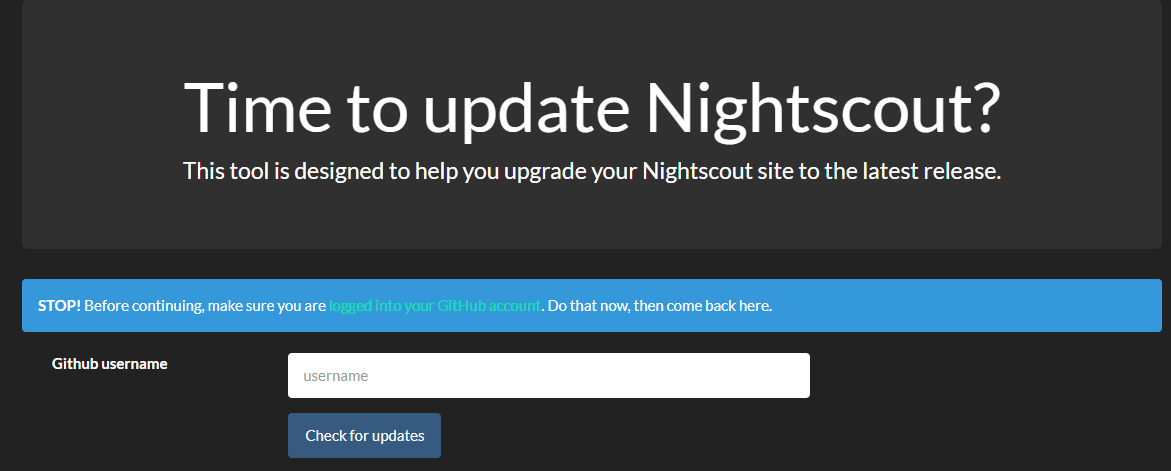
  3. Enter your GitHub username and click the blue button that says Check for updates. (Note: your username is not an email address.)                                                                                                                                                                                                                           Time to Update Nightscout                                                                                                    
  4. If an update is available, the tool will tell you that, provide directions, and give you a button that will take you to GitHub to finish the process.    I normally open it in a new tab so you can still see the instructions to do!                                                                                                                                                                                                                                                                                                                           Update availible                                                                                                                                                                                                                                                        
  5. Click the Continue updating at GitHub button. Review the directions on the screen that pops up, and continue.                                                          
  6. Click the green Create pull request button.                                                                                                                                                               
  7. Give your pull request a name (like “Update” or “Trek Update” — doesn’t really matter what this is).                                                                                                                                   
  8. Click the green Create pull request button.                                                                                                                                                                                                                                                                                                                                                
  9. Scroll down until you see the green Merge pull request button, and click it.                                                                                                                                                                    Merge pull request                                                                                                                                                              
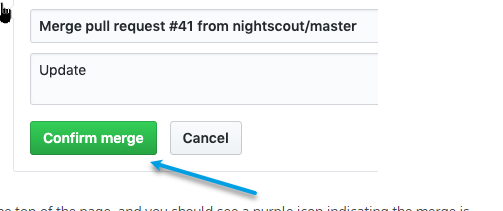
  10. Click the green Confirm merge button.                                                                                                                                                                    confirm merge                                                                                                                                                                                                                                                      
  11. Scroll to the top of the page, and you should see a purple icon indicating the merge is complete.                                                                                                                                                                                                                                                                                                       Merged Button                                                                                                                                     

    Note!
    If you do not see one of the buttons described above, continue to follow the green buttons until you reach the purple “merged” icon. If anything else unexpected happens, post in the Facebook group with details about what you tried and how far you got.
                                                                                                                                                                                                                                                                                                                                                                                                                                                                                                                                                                                                                                      
    Note!
    If you’re on Azure, or you’re on Heroku and have Automatic Deploys enabled, you’re done! If you’re on Heroku and don’t have Automatic Deploys on yet, or aren’t sure, run through these steps below!
                                                                                                                                                                                                                                                                                                                                
  1. Head to your Heroku dashboard and login if you need to.                                                                                                                              
  2. Go to the Deploy section.
  3.                                                   Deploy Tab
  4. In the middle bit, click on the GitHub button if it isn’t already showing as connected (in my case it is already connected!).
  5. Github Button                                                                                               
  6.  It will ask you to authorize the connection if you’re doing it for the first time.                                                                                                              
  7.  Type “cgm” into the repo-name search box, and click Search.                                                                                                                                                                          
  8. Click the Connect button once it finds your cgm-remote-monitor repository. You should now be connected.                                                          
  9. Let your site finish updating itself this can take a while, and it can also take a while longer for your config vars to show up.                                                                                                                                                                                                                                    
  10. As soon as you update your fork in the future with another Pull Request, enable Automatic Deploys here (from the master branch)                                                                                Automatic Deploys                                                                                                                                                                  
  11. If your Automatic Deploys were already on, then your site already has the new code from your fork update, and you’re done.                                              
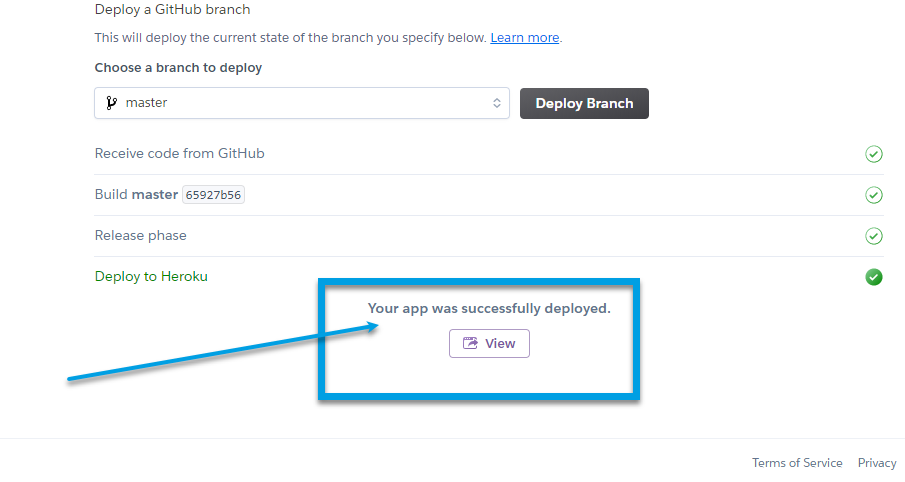
  12. If you’ve just turned the Automatic thing on, you’ll need to manually do the first deploy — make sure the branch is on master, and click the Deploy Branch button:                                                                                                                                                                                                       
  13. You’ll see a bunch of build progress notes scroll by — when it says it’s done, you’re done! (And now you will not need to do this Heroku step next time; just updating your fork with a merged Pull Request will trigger this part automatically.)                                                                                                                                                                                                                                                                               Deployed Finished
To verify that your site has updated, load your website in a browser. If your website is already open, reload it. Click the menu icon in the upper right and look toward the bottom of the settings panel to see the version number.                                                                                                                                                                                                                                                                                                                

Please note
Please note, it may take a few minutes before your site updates after updating the fork. Be patient! Some new features, updates, or bug fixes may require that you clear your browser cache before you will see the changes take effect.   


  • If you did not have any errors using the “Update My Version” link above, and your website is not showing that it’s at the current version, see these troubleshooting steps.

Uploader App

If you are using Cookie Monster or Dreamsicle version of the uploader, you do not need to update your uploader application. If you are using a version older than Cookie Monster, click here to update your Uploader App to the current version.

Release Details

To learn more about this release, see here.


    Cookie Notice

    This site uses cookies to ensure the best experience. By continuing to use this website, you agree to their use. Learn more about our policy